Saturday, February 12, 2011

Blog Hop Winner!


For my first blog hop, this was so much fun!  I absolutely read and enjoyed each and every comment.  Thank you for the wonderful compliments.  If you followed my blog, I make it a point of following yours (if you have one).  I'm now following some of the best people...I'm AMAZED at your wonderful talents! :)

The winner of the "Think Spring" blog hop will win the following blog candy:


The lucky winner is:


Lillian Child said...
Springs?? WOW - what a creative idea! These projects are just the sweetest thing!

I just discovered your blog and am now a follower - so very nice to meet you!
http://lillianchild.blogspot.com


I'll be contacting you shortly Lillian Child to congratulate you and get your mailing address! Hopefully I will hear from you no later than next Saturday.  Congrats! 

Saturday, February 5, 2011

Think Spring Blog Hop


Hello and Welcome to the "Think Spring" blog hop!  If you've stumbled onto my page and would like to start at the beginning, please visit Kathryn's site: http://wamfamily.blogspot.com  A big thank you to Kathryn for hosting a great blog hop!  If you've arrived from the wonderful and talented Java Jen's site, then you are in the right spot!  Here is the complete list in case anyone gets lost! :)

1) Wamfamily - Creations with Kathryn
2) Scrappin' Palace - Scrappin' Palace
3) Ms Dee - Dee's Special Things
4) Buggin Out - Paper Crafting Chic
5) lechristina3 - All Things Crafty
6) TinaB - Tina Time
7) Lissa - So Many Crafts, So Little Time
8) Crafty Baskets - Crafty Baskets
9) Java Jen - Java Jen Creations
10) Stephanie J <----You are here
 11) CraftyCreations - The Crafty Creation Spot
12) Jennifer Hawkins2 - Confessions of a Scrapaholic
13) Laura Mason - Scrappy Craft Corner
14) Scrappy Jess - Scrappy Jess
15) TX Scrapper Mom - TX Scrapper Mom
16) Kreimers - My Fantabulous Life
17) SoonerMT - Paper Renee
18) ToniBaczek - Happy Scrapper
19) Croppin Momma - Croppin Momma Designs
20) arahbeth - Scrapbooking with Sarah
21) Nicolette Simpson - Beyond Scrapin  


I am so excited to particiate in my first blog hop.  I am new to the Cricut, but have been 'crafty' since I was little! :)  Thank you for stopping by.  Please leave me a comment and please become a follower if you'd like...I'd be thrilled!


Think Spring Card
Yesterday was my birthday and I spent the evening crafting while hubby made us a great dinner and my family spoiled me with such thoughtful, wonderful birthday gifts!  During my crafting time, I made several of these cute cards to send to my friends in snowy Chicago, straight from sunny Florida to help them get through the blizzard of 2011! :)


For the flower pot, I used the vest and skirt shape (3 inches) pg 46, and a scalloped shape (adjusted to fit) pg 53 on the Paisley cartridge in Design Studio.  I hid the vest and utilized the skirt (upside down) as the flower pot.  Take a look...


Take some green wire (usually for jewlry making) and shape around a paint brush handle.  Cut some of your favorite flowers and glue together.


I cut small circles (using the Cricut or punch) and wrote "Think Spring" with a white gel pen.  Ink the edges of the white card stock, throw a ribbon or piece of coordinating paper around the bottom, and pop-dot the flower pot and wooohooo you've got a great card!
Here's the inside of the card.  I embossed the dragon flies with blue and green, and used a glaze pen to write "...it's right around the corner!" 


A Double Layout

I loved this "Think Spring' theme so much that I continued it onto a double layout.


I just need to take some pictures this spring as we plant our spring flowers, herbs and veggies, print them out and add them to the matted 4x6 areas!


I have blog candy for one lucky follower.  Simply leave me a post and become a follower (if you aren't already).  I will draw a random number on Feb 12th.  Please make sure you leave me a way to contact you in your comment OR simply check back on the 12th.

I've got some great embossed cards, two bottles of green glitter glue and two little strips of ribbon.  The stamp says "Spring is in the air".  Hopefully this blog candy will inspire you to "Think Spring" too!


Thank you for participating in this blog hop and stopping by.  I hope you are having fun so far, I know that I've had a blast!  Next, you will be visiting Sandy S in sunny California.  She is one of the most creative and kindest people that I know!   You are going to LOVE her blog! http://thecraftycreationspot.blogspot.com

Valentine's Day

Valentine's Day is right around the corner.  I've made some valentines for my guys and a couple of my crafty friends.  Enjoy!

Sunday, January 30, 2011

The best birthday present!


My DH gave me an ATG for my birthday...and it was on sale at Joann's for $17.99 (wow!)  So... with this official first present, may the birthday week begin! (giggle)

In all seriousness, thank you Eric for such a thoughtful gift that I've wanted for awhile now (and you got it on sale).  You ROCK!

Monday, January 24, 2011

Happy Birthday Robert!

This past weekend we were SO excited to attend the 50th birthday of our friend and neighboor, Robert. Our families became friends through our sons who went to elementary school together last year.  I made a shirt card simply by paper folding and adding a little glue!  If you haven't seen these yet, head over here for a great tutorial from Dawn.  These are a really great card to make for men/boys.  I know that I struggle sometimes when making a masculine card and this card was the perfect fit!
Inside the little shirt card, I typed up some phrases about the joys of turning 50 (like now you have an excuse to tell the same stories over and over, knowing the words to elevator music, he's only 5 years away from being allowed to join a 55+ community, he can now get the AARP discount, etc.)


Because Robert was celebrating the big 5-0, I chose a color scheme of black, white and silver.  The ballons and sentiment are from the Birthday Bash Cricut cartridge.

Tied the gift tag on the bag with some coordinating ribbon for the final touch!  Because Robert is a coffee drinker, we included two bags of D&D coffee, a coffee canister and an adult "sippy cup" (because he's over the hill now! ha!).

We had such a great time spending the evening celebrating with our friends on Robert's great milestone!  Happy Birthday Robert!

Sunday, January 23, 2011

Diane at Capadia Designs Needs Our Help!

Hello fellow crafters!  Diane at Capadia Designs has been chosen as a finalist to be a guest designer at Cosmo Cricket and she needs our vote!

If you have a moment, could you please head on over to the Cosmo Cricket and vote for Diane Campbell Payne (on the left side of the blog)?

Diane has been such a source of inspiration to me and many others.  Plus, I think she is absolutely the nicest person in the whole world....seriously!  Her designs are exceptional and her tutorials/videos on CDS are world-class!

Thanks for your vote!

First-ever Blog Hop

I am so excited about this first blog hop that I will be participating in.  A big thank you to Kathryn for organizing us! Another big thank you to Lissa for creating this beautiful banner.  Both of these ladies and the rest of the blog hop members are such a talented group of crafters, I can only hope that some of their outstanding abilities can rub off on me!  Stay tuned!

Wednesday, January 19, 2011

Skittles & Scrabooks Blog Candy Giveaway

Skittles and Scrapbooks just did a wonderful blog make over and to celebrate she is giving some fantastic blog candy away!!! Below is what Liz has up for grabs. On Jan. 31 she will pick a winner through random.org.... go check out her blog :) Skittles & Scrabooks Blog Candy Giveaway


There are THREE different prize packages you could win! So hop on over there by just clicking on the title of this post.


Blog Candy #1 --


Cupcake Cricut Lite cartridge!


We R Memory Keepers Goodies: Heart Attack Tool, Sew Easy - stitch piercer, Zig Zag attachment, Cross stitch attachment, and two cute Valentine's day stamps!


Blog Candy #3 --


Smörgåsbord: My Mind's Eye Mega Pack - Tres Jolie (borders, die-cuts and lots of paper! 200 pieces), 3 packages of Basic Grey rub-ons, Making Memories decorative packaging tape, Glitz Stamp roller, Ribbon Ring storage set, 4 jars of Bazzill flowers (brown, pink, cream, blue), American Crafts Remarks floral sticker books, Me & My Big Idea mini album kit... whew! Thats a lot of goodies!


Monday, January 17, 2011

Monday, January 10, 2011

Oh my gosh - I won Blog candy in a blog hop!

Thank you SO much to Sandy!  I followed a Valentine's Blog Hop and was chosen as a winner on Sandy's blog!

Won't you please stop by and visit her wonderful creations?
http://thecraftycreationspot.blogspot.com/

Thank you SO much Sandy!

Great News! Blog Hop

Hello Friends

I have great news! On Feb 5th I will be participating in a blog hop (topic will be defined soon!)  I can't tell you how excited I am.

What is a blog-hop, you ask?  A blog hop is a group of bloggers that organize themselves to all post (blog) about a topic.  You, the blog-hopper, will start out at blog #1.  After discovering what the first person posts, he/she will link you to the next blog.  After perusing that person's blog he/she will link you the next blog, and so on.

Some bloggers will have 'blog candy' or prizes that can be won.  All blogs will showcase a project just for the blog hop.  I've seen some of the most amazing work and have been awestruck by the talent displayed in these blogs.

Once our group decides upon a topic, I'll be sure to announce it and then I'll get busy creating and crafting.  Please mark your calendars to stop by and see the amazing work that will be displayed on Feb 5th!

Cheers!
Stephanie

Here's the list as it stands today!

1) Wamfamily - Creations with Kathryn
2) Scrappin' Palace - Scrappin' Palace
3) Ms Dee - Dee's Special Things
4) Buggin Out - Paper Crafting Chic 
5) lechristina3 - All Things Crafty 
6) TinaB - Tina Time
7) Lissa - So Many Crafts, So Little Time
8) Crafty Baskets - Crafty Baskets
9) Java Jen - Java Jen Creations
10) Stephanie J - Stephanie's Scraping/Stamping/Cardmaking Site
11) CraftyCreations - The Crafty Creation Spot
12) Jennifer Hawkins2 - Confessions of a Scrapaholic 
13) Laura Mason - Scrappy Craft Corner
14) Scrappy Jess - Scrappy Jess
15) TX Scrapper Mom - TX Scrapper Mom
16) Kreimers - My Fantabulous Life
17) SoonerMT - Paper Renee
18) ToniBaczek - Happy Scrapper 
19) Croppin Momma - Croppin Momma Designs
20) arahbeth - Scrapbooking with Sarah

Friday, January 7, 2011

Get Well Soon

I have a dear friend who is recovering from surgery so I wanted to get a "Get Well Card" out to her.

I cut a white cardstock base (11 x 5 1/2) and folded in half, cut a color layer (5 1/4 x 5 1/4) and the white color layer (4 3/4 x 4 3/4)

I stamped and embossed the white card layer and inside the card.


It's a little hard to see in the picture, but the embossing shows a slight 'rainbow' effect.


Because I'm new at embossing, I chose to emboss on two seperate pieces (the front and inside) incase there were problems! :)

I cut the tag out of the color cardstock from the Tags, Bags, Boxes and More cartridge (size 2 3/4).  I then stamped and embossed the sentiment in white.  I took my gel pen and 'stiched' around the tag.


I attached the tag with a coordinating ribbon.  Here's the inside of the card.

I made four of these, each one just a little different from the other.  On this card, notice the outside ribbon (end tucked under the top white layer), and the ribbon that goes around the card to the inside.  This is where the tag is attached.


With this card, I centered the butterfly on the front and only utilized one ribbon, still tucking the end under the white top layer, but wrapping the ribbon around to the inside.


On this card, I decided to try to attach the tag to the outside (this was my original design).  I ultimately decided that this was 'too busy' and attached the tag on the inside of the rest of the cards.


For the final touch, I stamped on the back of the card. :)


I enjoyed putting these cards together.  I sure hope Angi feels better soon and this little card brings a smile!

Happy Creating!
Stephanie
1/7/11


Supplies:
Cardstock - color of your choice
Cardstock - white
Stamps - I chose butterflies
Embossing stamp and powder
Ribbon - matching or coordinating to color used
White gel pen

Tuesday, January 4, 2011

Thanks a Melon!


"Thanks a Melon" is a thank you card that I put together.  The base of the card is just regular pink card stock with a small embossing strip at the bottom. 

I placed the assembled watermelon on a pop dot, and centered it over the black/silver strip that is backed with a piece of black card stock.


I cut the shadow background from a dark pink card stock and the "Thanks a Melon" from white card stock.  Before attaching, I inked the edges with a green stamp (I know it looks yellow here, but on th card it is a lime green)
As a final touch I embossed the back flap of the envelope... 


...and stamped it! :)


Here's the .cut file!  Enjoy http://www.4shared.com/file/_NbR_v1y/JBC-_Watermelon.html
Stephanie

Monday, January 3, 2011

My First Post

Hello and Welcome to my new blog!

I decided to start this blog to begin a creative corner for ideas, projects, posts, etc.  Because I work full time, have a family and go to school part time, I don't know how much time I will have to devote to the blog.  Time will tell but I hope this becomes a meaningful place for both of us!  Enjoy.

Santa brought me a Cricut Expression (Blue) for Christmas because I had been such a good girl this year!  Woooohoooo!  I can honestly say I was very overwhelmed at first.  I quickly learned that I absolutely needed to purchase the Cricut tool set to help me remove my cut pieces.


My first project was from the "Just Because Cards" cartridge.  I wanted to make "Thank Ewe" cards to send to anyone that sent us Christmas goodies or presents.  I honestly have to say that I think I picked one of the most difficult projects to start with.  I had no idea what I was doing.  Through a LOT of trial and error, this was the final product.

Whenever I make a card, I like to always make more than one (preferably 3-4).  I like to make variations, some things bigger, other things smaller.  Perhaps use slightly different colors.  Anyways, I ended up with two cards, and already sent the other one out before I could snap a pic.  :( 

I used solid pink cardstock for the base (5 1/2 x 11, then fold in half), and then cut the brown layer on a cutter (5 1/4 x 5 1/4).  Using up some of the pink cardstock scrap I cut the strip border (5 1/4 x 1 1/2), and the specialty paper (5 1/4 x 1 1/4).


I quickly learned that I needed to write all of this down if I ever hoped to repeat my steps.  The rest of the elements, I used the cricut to create.  This was also my first attempt at 'creating' a cut file using the Cricut Design Studio.  I'll attempt to figure out how to post .cut files on this blog in the next few days.  UPDATE: you can download the cut file here: http://www.4shared.com/file/B-aaBM6F/JBC_-_Thank_Ewe.html


Another lesson that I learned was I need to get myself organized.  I needed to document the size of my cut pieces, store any extras (aka: mistakes) to use later if/when needed.  So I took a regular mailing envelope and wrote down all the necessary info on the outside, and stored any left over pieces inside.  I wrote the cartridge name at the top left, and the specific .cut file name on the top right.

I chose this file system because it fits so nicely in a small box from Ikea.  I stored the envelopes lengthwise with any extra cards that I don't send out.  This way, when I need a card, I can go into my card box and (hopefully) already have one to go! :)

I also created the tabbed folders for the box and will put labels on them, but that is blog post for another day! :)
I cut out the black oval background for the text and the ewe's body from regular black cardstock.  The "Thank Ewe" text was cut from white card stock and the "Ewe" overlay was cut from the pink pattern paper from DCWV's Luxury paper.
The "Ewe", top layer strip, and top layer tag were from the pink pattern paper from DCWV's The Luxury Stack.  I then cut out the tag background and ewe background from regular white cardstock.  For the ewe's wool (or coat), I cut this from white sparkle paper and cuttlebugged it.  I also cuttlebugged the top pink layer of the tag. Then I assembled all of the pieces, secured them to the card and  used a pop-dot to attach the ewe to the strip.
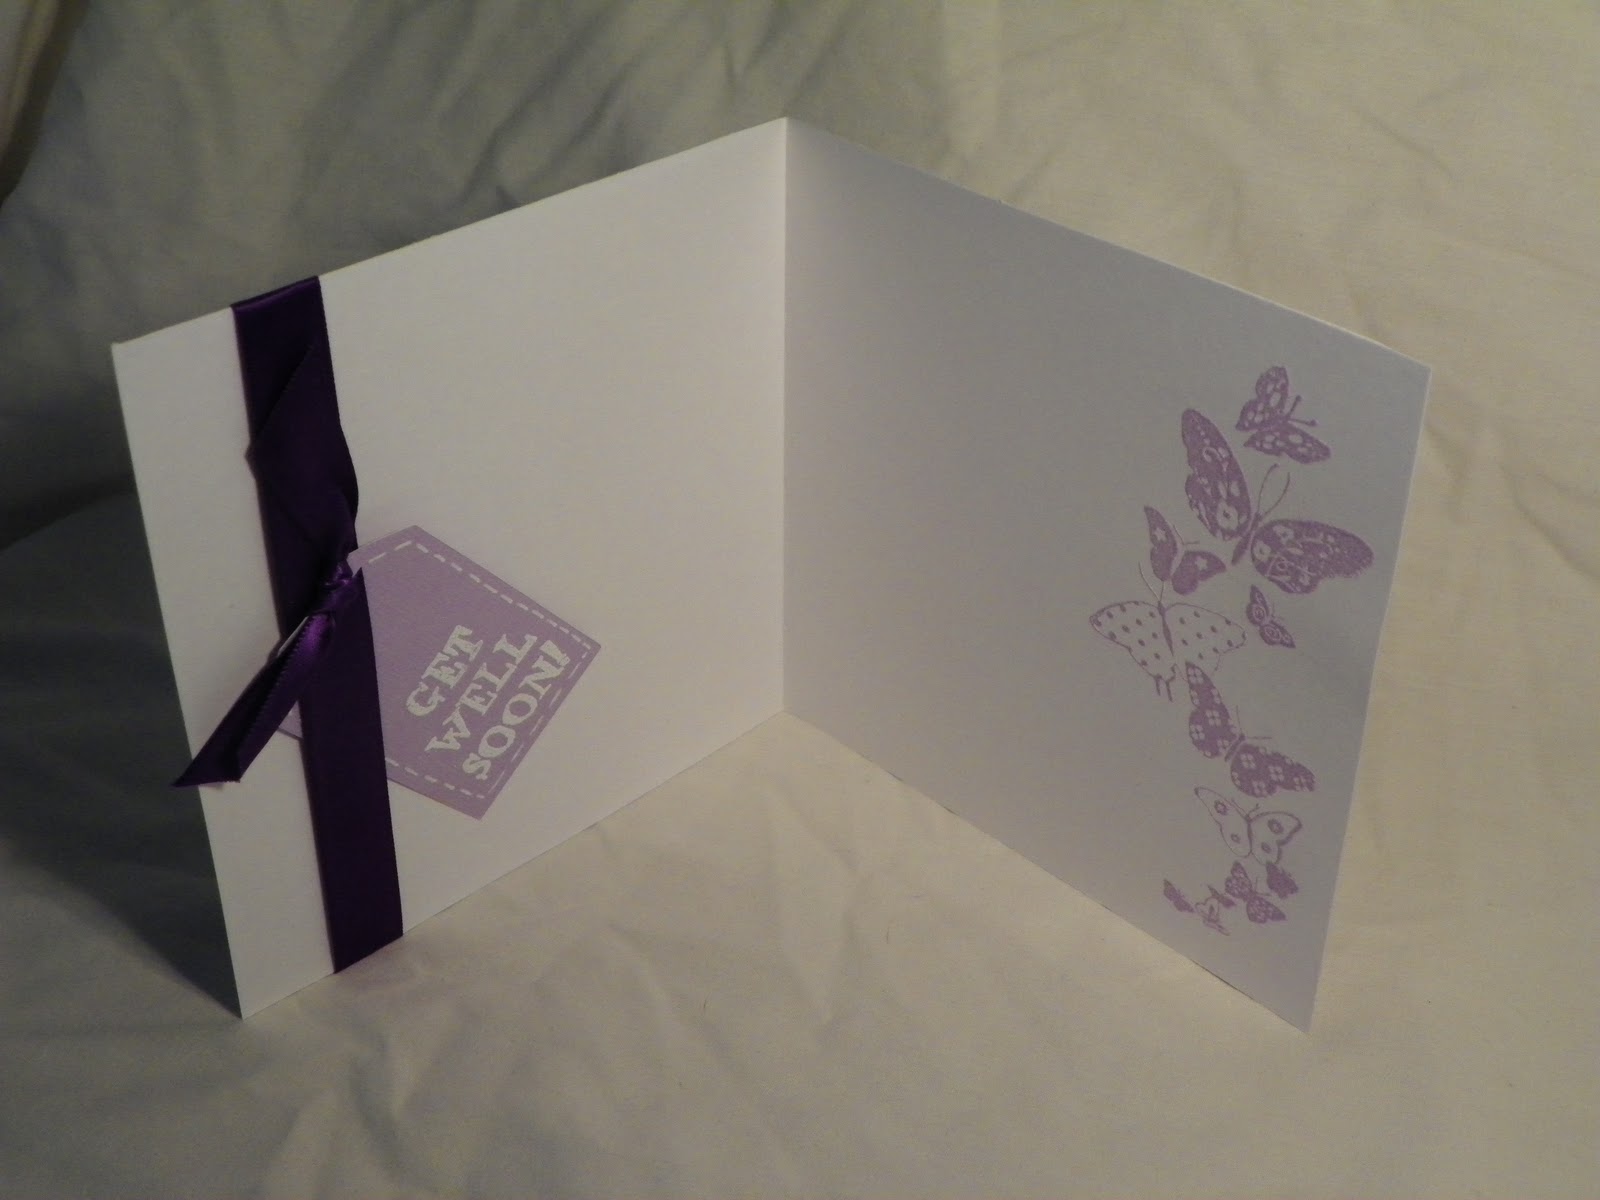
To tie the front of the card in with the inside, I cut a strip of the white sparkle paper, cuttlebugged it the same as the Ewe's coat and stuck it inside the card.
As the last final touch, I like to stamp all of my cards on the back with a "Handmade with love" stamp.  Looks like I needed a tad bit more ink on the stamp; I will note that for next time! :)


So, all in all, it was a great first experience.  Challenging, but great.  I was very happy with the end result.  Bonus part is that everything is documented, and I even have a cut file to help me crank out others in the future.

For my first blog post, I ended up with a lot to say and I'm very happy with the launch of the initial blog post.  I hope to continue to document and share my creative journey and pass along the knowledge that comes from each project.  Happy New Year and happy reading!

Stephanie
1/3/11